Dodge Durango Forum banner

2018 Durango Sub Replacement,need clarification!

1 reading
30K views 27 replies 5 participants last post by  lux  
#1 ·
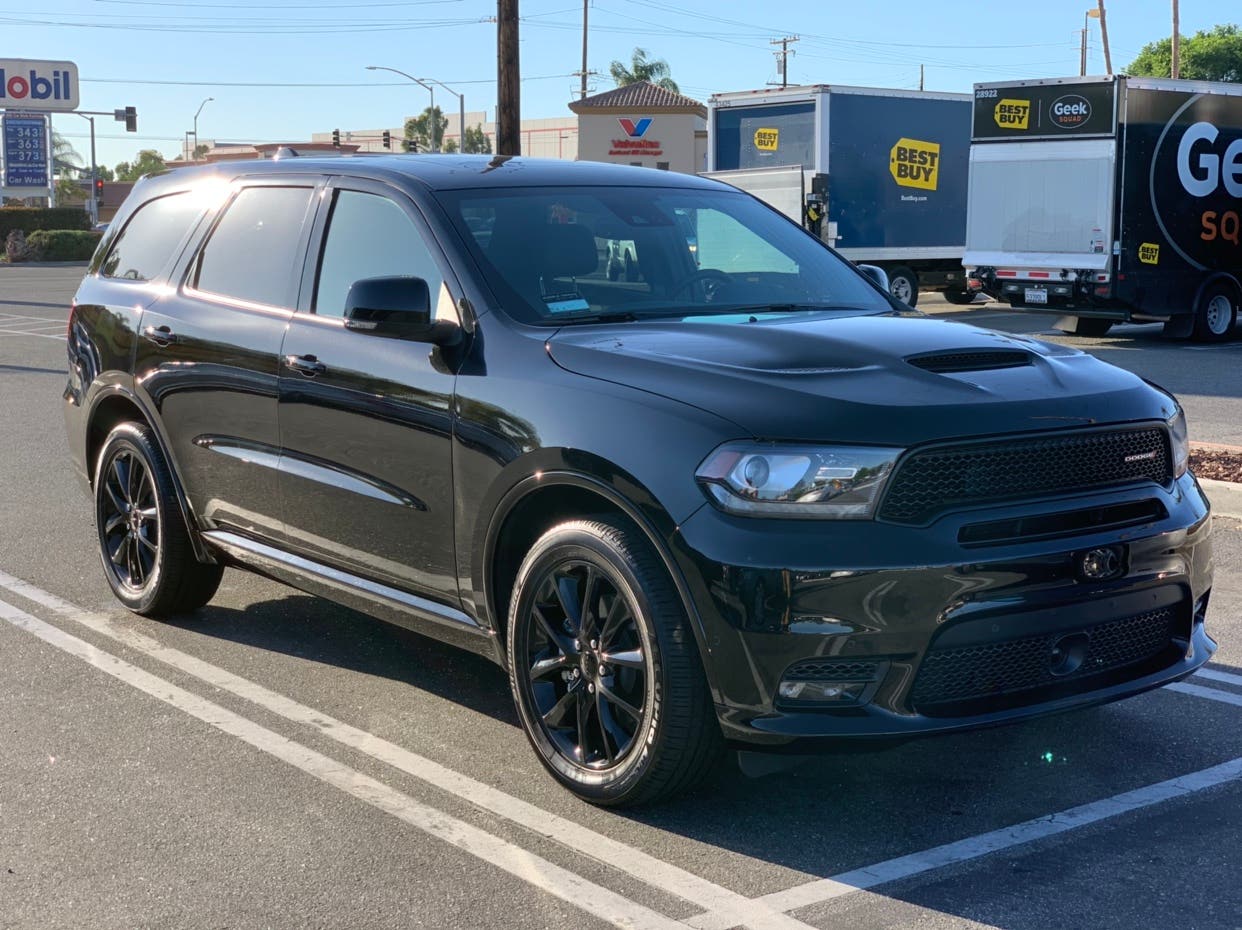
Hello all! Im new to the forum and to Dodge Durangos. I just bought a brand new Durango GT AWD 2018 and while Im somewhat happy with the audio system there is clearly much room for improvement. In the past Ive had just about every vehicle sound system upgraded so this comes as no surprise that I wanna upgrade this one lol. The first thing Id like to do is replace the sub with an aftermarket setup. Door speakers will come down the road but right now I NEED some mo bass in my Durango. I have some experience installing radios and door speakers,EQing my amps and whatnot but have never ran wires to hookup a sub,so I will be taking my Durango to a audio store to get this job completed.

What I would like to know is if I have the right equipment (keeping in mind space requirements) for the install. Id also like to have piece of mind that the audio store did everything right and doesnt cut corners or cheap out in anyway. SO any tips on what to look for after I get my vehicle back or anything I should notify the installers of that I should have done a certain way in the Durango. So please share!

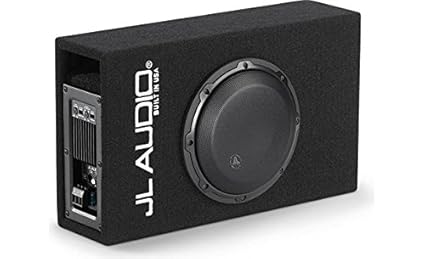
What I plan on replacing the stock sub with:

ACP108LG-W3v3 - Car Audio - Subwoofer Systems - MicroSub+? - JL Audio

Image


or

ACS110LG-TW1 - Car Audio - Subwoofer Systems - PowerWedge+? - JL Audio

Image


In your opinions what would sound better in the stock speaker location? Ported 8" or Sealed 10"?

Also I was told I might need these of these which I already have

https://www.audiocontrol.com/car-audio/factory-system-upgrade/lc6i/

Image


Image


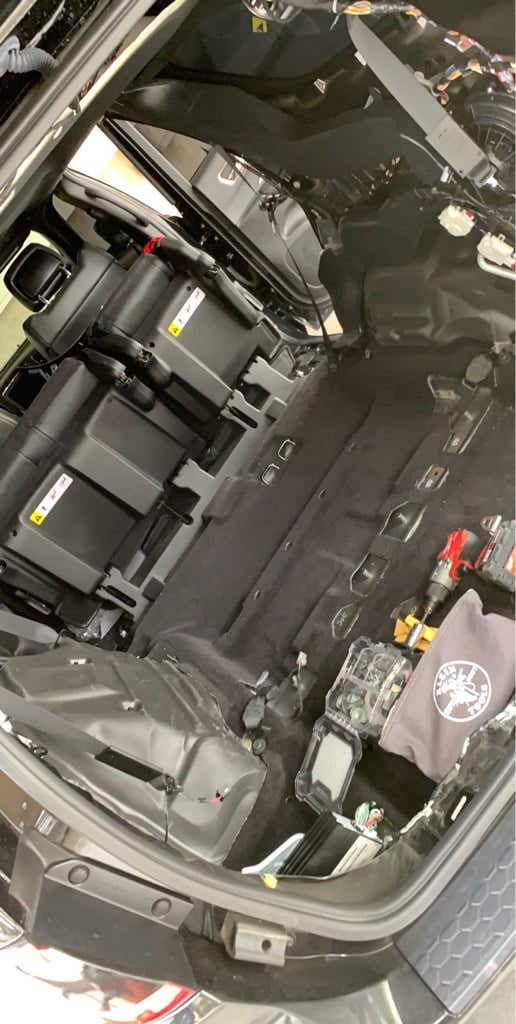
Anything else besides these parts and the wiring I should add? Anything I should make sure the installers should do (wiring paths/locations ect)? Thanks!
 
#2 ·
If you are not fully set on the LC6i I would suggest you look into a PAC AmpPro https://pac-audio.com/catalog/amppro-amplifier-interfaces/ap4-ch41 It will give you a perfectly clean signal from the radio and retain all the chimes etc. You will also not have to (or have the installer) butcher up your wiring. PAC also has an amplifier T-harness so that you can more easily wire back to the speakers if you want https://pac-audio.com/catalog/audio-interfacing/aph-ch01

The AmpPro you can get online for about $260 and the harness for about $35.

As for the loaded enclosures, it just depends. Are you actually trying to place the box in the location that the factory one is under the rear floor or just simply in that area in the rear above where the factory sub is located? With the 8" you may get some more output around where it is tuned to but the 10" can be a bit cleaner sounding, up to your ears.
 
#3 ·
Thanks for the reply! Im not fully commited with the LC6i yet. I figured since Ill be keeping my durango for the next 10 years I dont mind how its installed so much,as long as its clean. My plan is to eventually add new door speakers and my 4 channel amp so the LC6i would be available and ready to handle everything. I dont know much about the PAC AmpPro. Would it work the same? Will i be able to add another amp to run the door speakers down the road? And yes I would like to replace the stock sub and enclosure and put this in its place under the floor. I was hoping someone here would know if the JL sub/box would fit with no mods. It would be great if anyone had measurments of the stock sub or the enclosure space. FYI I have the beats stock system in my DD.
 
#4 ·
Certainly! If you have not already done so I would suggest that you look at Lanson's and MoparMike's builds. They will provide you with a ton of information as well as measurements, both physical and auditory.

https://www.dodgedurango.net/forums...et/forums/durango-electronics-2011/24385-all-out-audio-build-lansons-15-rt.html
https://www.dodgedurango.net/forums.../durango-electronics-2011/24413-moparmikes-2015-dodge-durango-r-t-sq-build.html

The AmpPro connects with a T harness behind the screen. It passes all information on to the factory amp, but then provides you with 5V(or 4, selective) front/rear/sub RCA connections. You can also purchase a toslink addon to the piece if you have equipment that would make use of it. This way you can add any amps/EQs that you want. It also allows you to change to a small degree the factory 3 band EQ.

Dean at 5 Star does a good job of discussing it here

As for the JL boxes, I do not know if they would hit in the factory spot. You will have to look at the dimensions that Lanson/Mike have in their threads and judge. Though you are then going to put the false floor back on top of it cutting your output. My personal plan was to put my amps where the sub is and just place the box on top of the false floor. I have also in the past thought about seeing if the factory sub can just be flipped over somehow to help push more air into the cab instead of down into the chassis. I have Beats as well and about the only thing that lets you know you have a sub in there is 20-35Hz, its pathetic.
 
#5 ·
Thanks again! Plenty of great info in those threads,excellent builds too. This sounds like something I could tackle myself and save some monies and put it towards more equipment. As for the new sub and output in the stock area,would it be a huge drop? Would it be worth it to drill some miniature holes in the stock cover piece? Could make some kind of neat design or something out of it. Also a couple others questions,how are people running the battery cable without it being to noticeable coming out from under the battery compartment cover? Cover would have to stay propped open some no? Whats the most convenient path for the RCAs from head unit to the back sub location? And lastly where would be a good location to place the Amp Pro for a convenient spot to remove it for updates ect.
 
#6 ·
Manual: https://pac-audio.com/index.php?controller=attachment&id_attachment=996
Sub placement and holes: If you are able to actually fit one of those enclosures where the factory one is, sub facing up, I would not bother messing with the cover unless you have a spare one. Don't think it would make THAT much of a difference.
Wires: You should be able to tell from Lanson and Mike's builds where to put them, but the gist is the power can go under the carpet along the passenger side easily and can drop into the cargo area. RCAs should be able to come down the center hump.
AmpPro: It will sit behind the radio/lower dash. The T-harness isn't very long as you can see on the PAC page. The connection for updating is simply a usb cable so just leave one connected and wrap it up in easy reach so if/when you need to make changes/update it just take a laptop into the truck.
 
#7 ·
Hey thanks for the input. I finally got all the pieces I need minus the amp wiring kit and Im readdy to go. Still debating if I should install everything myself or take it in,a lil bit nervous about taking apart my new ride. Does anyone have pics or a link on how to revome the dash radio panel? I imagine there are just clips holding it in but Id like to make sure where to pry it,in peticular the bottom of the trim. Thanks.
 
#8 ·
Were you able to spend some time on the truck Furyan or decide to take it to a shop? I was finally able to get some funds together and got the parts to get my setup going here in the next few weeks. I will be likely going back to Lanson and MoparMikes installs to remind myself of some of the tips/hurdles and will provide feedback if anyone has questions.
 
#9 ·
Hey Gaiden sorry its been awhile. I still havent gotten my sub installed as life has gotten in the way,however I found out a guy i work with is very skilled in various installs so Ima tackle it with him once i get the chance. I will try and get progress pics during it. How is your install going?
 
#10 ·
No worries Furyan, we all understand. Mine is going slow and messy. Only have a little time here and there to do anything at all. I was able to get the AmpPro installed and hooked up to the smaller of my two old amps (the OptiDrive 2200 ate some resistors that I am having someone look into possibly fixing, otherwise having to wait to get a 'real' amp). Sadly though I have not had the time to actually flex loom and properly run all my cabling, simply don't have the free time. Good thing is that at least I have a little bit of bass now (140W from an Alpine T220 :( )
 
#11 ·
So I bought my Durango about 6 months ago and unfortunately I’ve been dealing with the “premium” Beats audio system this whole time. It’s literally been just eating away at me. This is my first brand new car and with it being so sophisticated I was a little scared to just rip it apart! I didn’t really have a plan but I knew maintaining full stock features was a must and for the first time I wanted to run stealth. I’ve done all my past systems, always bought pre made boxes for simple installs but this time I wanted something more custom and with the Durango not having much space to run a stealth setup custom was the only way to go.

Image


Last month I got the urge to just go out and buy equipment to kick my ass into gear and just go for it! So that’s what I did, I bought:
2 JL Audio 13TW5v2 Subwoofers
JL Audio RD1500 Mono Block Amplifier
JL Audio Fix-86 OEM Integrating DSP
And A XD-PCS2-2B: 2 Amp 2 Gauge Amp Kit


I originally wanted to go with this layout so that I could maintain access to my spare tire and mount the amp in the enclosure somehow.
Image


Then I thought about making a rack to mount the amp in front of the access to the spare but still couldn’t find the room for enough cubic ft.
Image


I ended up going with this layout simply to maximize enclosure size. I knew I had to fiberglass a box and quickly began gathering as much information on FG boxes as I could.
Image


I had never worked with fiberglass and once I got started I realized I was in over my head but I was already in too deep! I taped everything off and mounted a piece of styrofoam to create a pocket for the spare access. I was nervous of the resin vapors taking away my new leather smell so I was extra cautious and went a little overboard haha!
Image

Image


I Laid out my vision and just ran with it, I rough cut my mdf and mocked it up and started glassing.
Image

Image

Image


I got a little overwhelmed and tired of glassing at some point but fast forward and the box pretty much now finished I just need to sand and decide on a finish I will post pictures later but this is close to what I ended up with.
Image


Today I spent a majority of the day TEARING the Durango apart everything I was scared to do I did lol after a month + into this project I felt myself procrastinating just being overwhelmed and it’s not going to finish itself so I jumped in! Here’s what we have now.
Image


I will say after turning the Durango into a Jeep Grand Cherokee removing the 3rd row that has been folded down the whole 6 months I’ve had the car has me wishing I went a different route but after all this time fabricating the fiberglass box IM USING it haha.


So now I’m at a stand still trying to decide

1. If I want to scrap the Fix-86 and go a different route integrating the OEM system. I have been contemplating the PAC Audio Amp Pro and the Maestro. I REALLY don’t want to go cutting into all of my wiring and like I said I insist on keeping the rear proximity sensors, Bluetooth capabilities and everything else.

2. What to do about speakers. I was thinking about going with JL Audio C5 6.5 components in the front C5 6.5 coaxial in the back. And using JL Audio’s C7 3.5 Center speaker? Should I go Focals for speakers? What advantages do I have finding a 6x9 for the front? Do I need to replace the rear tweeters in the D Pilars for ambient noise? Am I going to run passive or active to achieve my goals?

3. What sound deadening brand to use.

Thank you if your still here I know this is a lot to read through!


If I can help out in anyway let me know fellas! Maybe we can all bounce ideas back and forth [emoji1690]
 
#12 ·
Very nice! Curious to see how everything turns out! I think a couple years down the road I'll most likely add another amp and switch out the fronts for something waaaaay better. I don't sit in the back of my Durango nearly enough to justify or appreciate a full speaker upgrade. But who knows decisions like these always change lol.
 
#14 · (Edited)
Small update finally give in and made an appointment with a local installer to have my PAC and sub installed,I wanted to do it myself but I just dont have the time at all lately. He is giving me a good discount tho. Im also having him run some extra wires for an amp Im planning on installing for the door speakers eventually. Been eyeing DSP's,the miniDSP C-6x8 or the JL TWK 88. And for door speakers the Morel Tempo Ultras 692's (fronts) and Morel Maximo Coax 5's (backs) and throw some sound deadener throughout the doors as well,thanks Lawson for the breakdown. May upgrade the center speaker and will leave the back pillars alone. Gotta figure out where I could hide the amp first to keep the inside as stock as possible,aka totally stealth. Also going to thow on some Viper repos and 275-55-20's later in the year. Ill see if the installer can get some pics of the PAC/sub install.
 
#15 ·
Got my JL sub and PAC unit installed finally. Good news is it fits,pretty snug,but it fits. And its a huuuuge improvement over the stock sub. So for those lurking the JL ACS110LG-TW1 Powerwedge+ will fit in the stock sub location. Now to fine tune it a bit. Next step will be door speakers and sound/rattle proofing. There are some panels rattlin from the sub in back so Ill start there. Couple pics show the PAC bass knob and how the sub looks when I pull back the spring loaded panel behind the last row of seats.

Image


Image
 
#24 ·
Ohh okay I thought you meant the center console.. I have that removed already if I take the screen back out I can reach down in there to access that spot?
At 2:45 in the video it shows the backside of the piece I'm talking about,my bass knob is mounted just left of the phone charger port located on the far right. You may be able to install it without removing that piece and just doing it with the stereo face panel off but not sure if there's enough clearance that way.