Dodge Durango Forum banner
1 - 20 of 38 Posts

Gerik Bensing

· Registered
Joined
·
407 Posts
Discussion starter · #1 ·
I'm working on a fold-down light rack for my Durango that'll sit just above the front doors. It's coming along nicely but I have two issues.

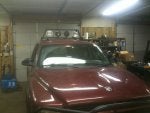
How do I attach the rack to the vehicle? It's in front of the rails and bars already on a Durango, so utilizing them won't work. I've seen some roof light bars, but the picture quality doesn't show how they attach. I have a picture attached showing one of these bars and where I intend to install my bar. They appear to attach in between the top of the driver side door and roof. I looked at my Durango and it looks like I could drill some holes to attach my rack along there. Is that what you need to do? Or do they somehow clamp in?

How would I go about bringing the wires down? I was reading about drilling holes and what-not, is there a better way?

How do I pull down the ceiling inside my Durango? If I try and pull on it it feels like it's glued in or something and it feels like if I bend the material it'll crease. I want to know this in case I need to make various holes in my roof.

THANKS!
 

Attachments

The headliners on these vehicle can only be removed by removing ALL of the trim around ALL of the pillars and ALL the headliner lights and trim; this includes trim around the rear A/C if so equipped. You then gently pull the headliner down once everything's removed being careful not to bend the headliner, it'll crease easily, and then direct it out the back of the vehicle.
 
You're welcome. I understand it's a huge task for such a simple thing. lol I already did it myself on this one and it was like? Wow, all this work for that! Come on now!
 
Gerik, while you need to be complete as mentioned above, it only takes and hour or so to get the headliner out. And yes, you walk it out the back/open hatch area.

Once out, you can mount and drill wherever you want/need to. I suggested some additional metal bracing underneath the roof with locking nuts and silicone sealed holes where you penetrate the roof. You can get nice strips of aluminum for making brackets at any Lowes. Without it, the sheet metal may be to thin to support stuff without help underneath.

On a side note, we missed you at Carlisle. I thought I was told you were getting HeavyD's unused pass??

IndyDurango
 
You'll want to make up "fish plates" that'll sandwich the roof between the plates and the mounting points for the bar and then run the bolts through the plates to spread the load out over the sheet metal. Otherwise you'll get stress cracks and water leaks in the roof. Also, be sure to silicone the mounting holes fully to prevent water leaks. LED lamps would be lighter than heavy metal lamps. Maybe some Lightforce lamps that are made out of lexan? That would reduce stress. Good luck!
 
Discussion starter · #7 ·
I'd love go with something like LightForce, but they're way too expensive. I bought four Hella 500 lights. Their total weight comes in at around 8 lbs, so it's really not so bad. The rack itself should weigh another 10-15 lbs.

IndyDurango said:
Gerik, while you need to be complete as mentioned above, it only takes and hour or so to get the headliner out. And yes, you walk it out the back/open hatch area.

Once out, you can mount and drill where ever you want/need to. I suggested some additional metal bracing underneath the roof with locking nuts and silicone sealed holes where you penetrate the roof. You can get nice strips of aluminum for making brackets at any Lowes. Without it, the sheet metal may be to thin to support stuff without help underneath.

On a side note, we missed you at Carlisle. I thought I was told you were getting HeavyD's unused pass??

IndyDurango
Okay, I think I'll do that. No one told me about HeavyD's pass. :( Oh well. Next year!
 
Gerik,

If you pull back the rubber weather seal right where the door closes against the body, you'll find a metal plate and series screws that holds the seal onto the body. My Lund Lunar Visor has metal brackets that fit down over the edge of the roof on each side that are held in place by those screws (with the addition of drilling one extra hole.) I ran the wiring for the lights in the visor down the drivers side behind the weather seal and into the engine bay where it's attached it to the power/ground leads for the parking lights.

Depending on how heavy your light rack is, this could be another possible mounting method that wouldn't involve removing the headliner??

Note, I'll post pix later showing details of how my visor is mounted.
 

Attachments

Discussion starter · #9 ·
Thanks, I've actually decided to just attach it to the rails for the roof rack. I've re-enforced the rail with PC-7 on the underside and will mount a six inch bracket to each rail. The light bar is going to be fairly heavy at around 20 pounds with everything installed, so with it attached to the rail, the load will get very well spread out. It's not quite the look I was going for, but it should be much cleaner.

I also took the headliner out yesterday (those visor clips and hangers are a pain in the butt) and discovered I bent my roof support pretty good awhile back. My one friend likes to sit on my roof when I drive around the coal basin (quite frankly he should be a professional stunt man) and with all the bumps and what not, it got pretty bent. I bent it back to the best of my ability. No more riding on the roof for him!
 

Attachments

Discussion starter · #13 ·
The light rack is done (sorry I haven't posted more pictures yet) but it leaks! I believe I sealed everywhere the plate meets the roof rail, but my attempt to seal where the bolts meet the plate hasn't worked. Apart from simply applying silicone around the bolts after everything is tightened down, what might work?

Also, where the wires come in is also leaking and, before I just go and silicone the crap out of it, any thoughts on how to do it better?
 
I always used silicone around the holes in the roof prior to bolting the bars to the roof and a rubber gasket between the bar and the roof with the holes in the gasket just slightly smaller than the bolts as an additional seal. I also used a rubber grommet where the wire ran through the roof and then some asphalt based sealant like what's used at the bottom of vapor barriers in home construction as it stays soft and pliable and will continue to seal.
 
Discussion starter · #15 ·
Finally got everything sealed, now I just need to figure out why it whistles? I think it's the top of the frame that's doing it. I've covered up various parts with tape and cardboard to find the cause, but have had no luck so far. It starts at around 50 MPH. Does anyone else with roof lights have a whistling problem?

Here's some pictures.

<img src=http://img.photobucket.com/albums/v39/Gerik/IMG_1089.jpg width=640>

<img src=http://img.photobucket.com/albums/v39/Gerik/IMG_1087.jpg width=640>

<img src=http://img.photobucket.com/albums/v39/Gerik/IMG_1088.jpg width=640>

<img src=http://img.photobucket.com/albums/v39/Gerik/IMG_1090.jpg width=640>
 
That's great Gerek!
 
Discussion starter · #20 ·
beastofwar said:
Are the slanted telescoping tubes sealed and capped at both ends?
It's currently made of PVC with about 6" of PC-7 filling in the ends where the bolts go through to help strengthen it. Eventually I'll get good fitting metal or a good linear actuator that can handle weather and move at the speed I want? for a reasonable price.

If you're thinking that could be the cause of the wind whistle, it's not. I covered it up well with tape and that didn't make any difference.
 
1 - 20 of 38 Posts